Why Start Seeds on Sponges?
While the traditional way to start seeds is to use soil, there are some good reasons to use sponges for seed growing:
You don’t need messy soil. You can watch the seeds grow and roots develop. Sponge seed germination happens rapidly. It’s easy to sprout a lot of seeds in a small space. The sponges can be reused if seeds turn out to be unviable. It makes a great experiment for children.
Here are some great plant choices for seed rowing on sponges:
Lettuce Watercress Carrots Mustard Radish Herbs Tomatoes
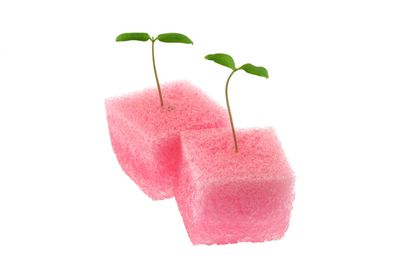
How to Plant Seeds in a Sponge
First, start with sponges that have not been treated with anything, like detergent or antibacterial compounds. You may want to treat the sponges with diluted bleach to prevent mold growth, but rinse them thoroughly if you do. Use the sponges whole or cut them into smaller squares. Soak the sponges in water and place them in a shallow tray. There are a couple of strategies for putting the seeds in the sponges: you can either press small seeds into the many nooks and crannies, or you can cut a larger hole in the center of each sponge for a single seed. Cover the tray in plastic wrap and put it in a warm location. Check under the plastic wrap occasionally to be sure there is no mold growing and that the sponges have not dried out. Give the sponges a regular mist of water to keep them moist but not soaking wet. To transplant your sprouted seedlings, either remove them entirely and place in a pot or outdoor bed when ready or trim the sponge down and plant the roots with the remaining sponge still attached to them. The latter is useful if the roots are too delicate and can’t be easily removed from the sponge. Once they’re big enough, you can use sponge-grown seedlings as you would any seeds you started in soil.